 PowerupStack
The recommended way to install a Minecraft plugin on PowerupStack is through the Workshop. It selects a compatible build and can automatically configure supported plugins. Paid servers can also upload plugin JAR files manually.
Minecraft plugins require compatible Java server software such as Paper or Spigot. Vanilla Java and Minecraft Bedrock Dedicated Server do not load Bukkit, Spigot, or Paper plugins.
Install a plugin from the Workshop
- Open the Minecraft instance in the PowerupStack panel.
- Select Workshop, then Browse workshop.
- Search for the plugin and open its component page.
- Select Install.
Choose a version, build, and artifact compatible with the server platform.
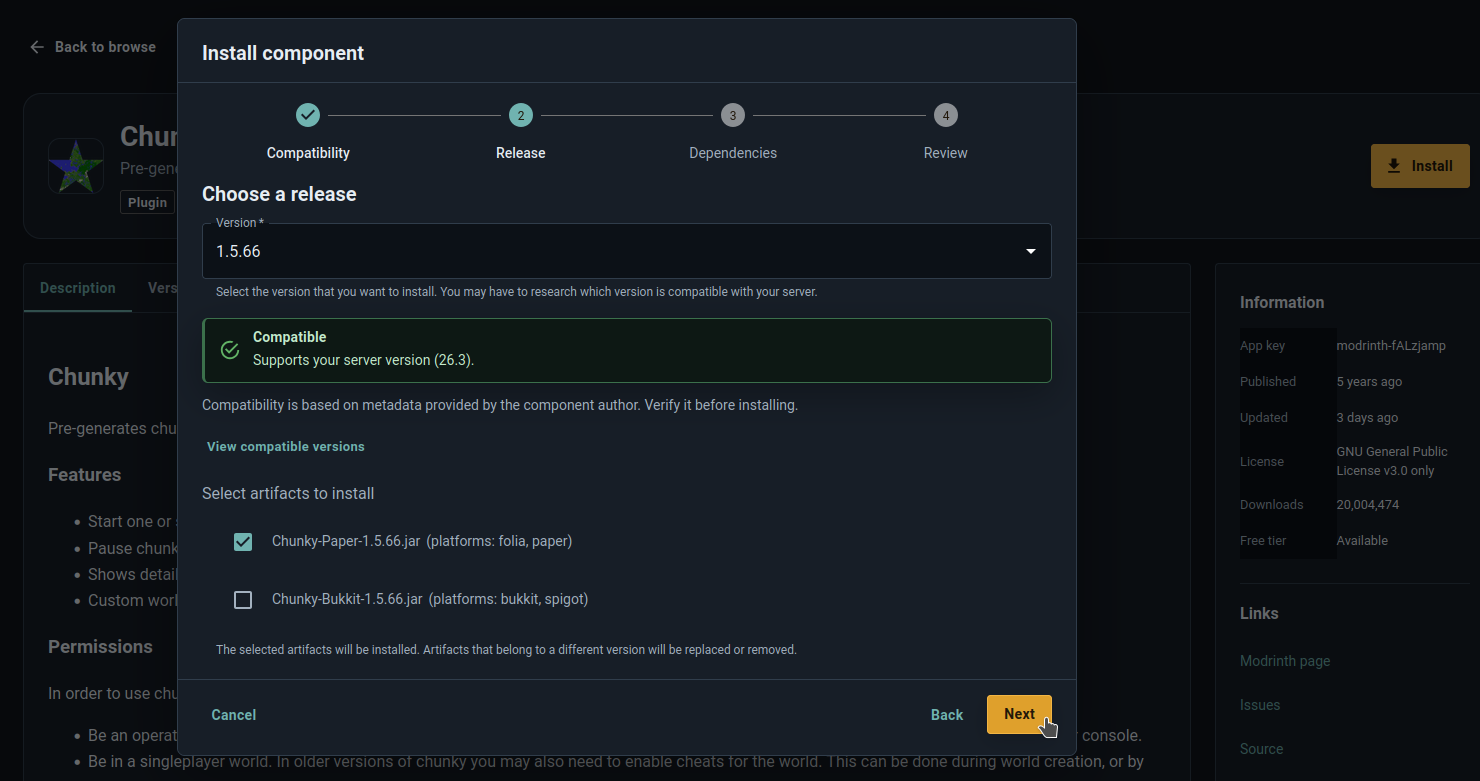
- Keep automatic setup enabled when the supported component offers it.
- Review dependencies and installation changes, then confirm Install.
- Restart the server to load the plugin.

Automatic setup is currently available for selected components, including Geyser and Simple Voice Chat. It handles their PowerupStack network and configuration requirements during installation. Their dedicated guides also document manual setup:
Install plugins on a free server
Free-tier instances can install approved plugins and other content from the Workshop. They cannot upload arbitrary plugin JAR files through the file manager.
If a component is listed but unavailable on the free tier, submit a Workshop review request. Approval is not guaranteed; the review checks whether the component is suitable for the shared free service.
Manually upload a plugin on a paid server
- Download the plugin JAR from a trusted source such as PaperMC Hangar, SpigotMC, or Modrinth.
- Confirm that it supports the Minecraft version and server platform.
- Stop the Minecraft server.
- Open Files and return to the instance root directory.
- Open
plugins/. If it does not exist, start compatible server software once so it can create the folder, then stop the server again before uploading files. Upload the
.jarfile intoplugins/.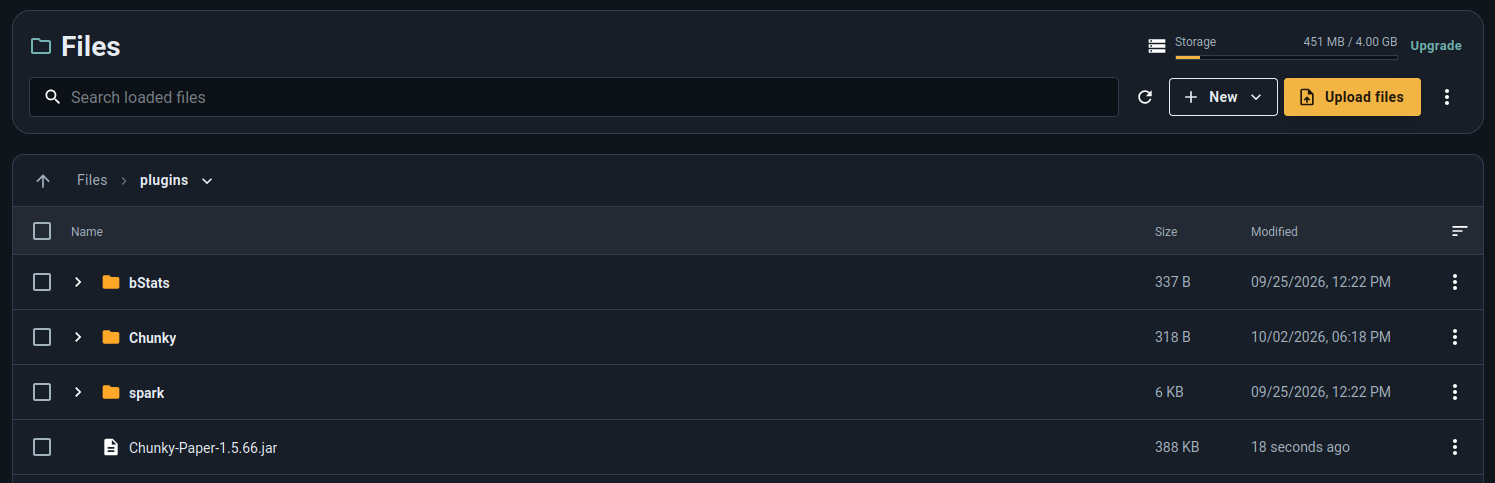
Start the server and check Console for the plugin's enable message or an error.

Do not extract a plugin JAR. The server loads the JAR directly from the plugins/ directory.
Dependencies and compatibility
Some plugins require libraries or other plugins. Install every required dependency and select versions compatible with
the Minecraft version and server software. A plugin built only for Fabric or Forge is a mod and does not belong in the
Paper or Spigot plugins/ folder.
If the server crashes or returns to Stopped after installation, read the first relevant Console error, remove the new component, and follow the startup troubleshooting guide.
Confirm that the plugin loaded
Run the plugin's documented command or check the startup log. If it does not load:
- Confirm the JAR is directly inside
plugins/, not inside another folder or archive. - Check for missing dependencies and version incompatibility.
- Confirm that the server runs Paper, Spigot, or another platform supported by the plugin.
- Restart the server after installation.
- Review the complete Console error rather than relying only on the exit code.