 PowerupStack
PowerupStack's free tier lets you create a Minecraft Java Edition or Bedrock Edition server without entering payment details. This guide takes you from registration to joining your new server.
Before you begin
You need a free PowerupStack account and a copy of Minecraft that matches the edition you plan to host. Java and Bedrock players cannot normally join the same server, so choose the edition used by you and your friends.
If you need Java and Bedrock crossplay, first create a plugin-compatible Java server and then follow the Geyser crossplay guide.
Create the server
- Register for a free account, or log in if you already have one.
- Open the Instances page and select New instance. You can also go directly to the Minecraft instance creator.
- Under Select game, choose Minecraft Java Edition or Minecraft Bedrock Edition.
- Under Select application, choose the server software:
- Choose Vanilla for the official Minecraft server experience.
- Choose Paper for a Java Edition server that can run plugins.
- Select a Minecraft version. The latest version is selected by default. Use the version your players have installed unless they plan to change versions before connecting. You can change the Minecraft server version later.
- Choose the region closest to most of your players. The panel selects the region with the lowest measured latency by default.
- Choose the Free plan, which is available in Europe, North America, Singapore and Australia. You can upgrade later if you need more resources or fewer free-tier restrictions.
- Enter a memorable subdomain under Personalize, or keep the automatically generated one. This becomes part of the address players use to connect.
- Review your choices and select Create instance. The panel opens the new instance's dashboard when it is ready.
Start the server for the first time
- Select Start on the dashboard or Console page.
- Accept the Minecraft EULA if the panel asks you to do so. The server cannot finish starting until you accept it.
- Wait while the server creates its configuration files and first world. The first startup can take a few minutes.
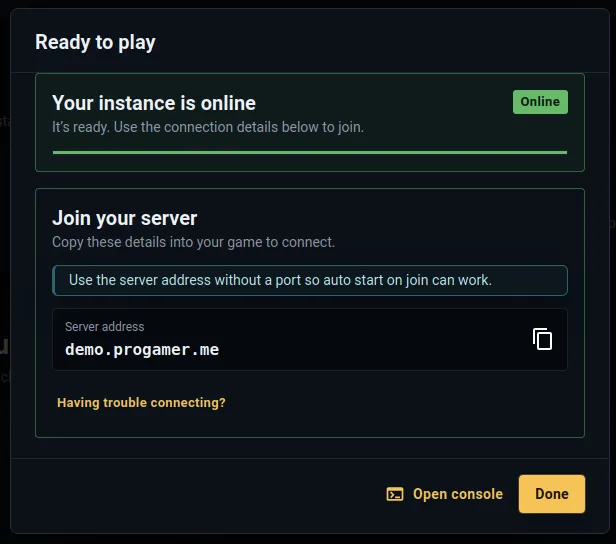
- When the status changes to Online, copy the connection details from the Ready to play dialog or the instance dashboard.
Connect to your Minecraft server
Open Minecraft using the same edition and version as the server, add a multiplayer server, and enter the connection details shown in the PowerupStack panel.
- Java Edition: enter the server address in Server Address without adding a port. The PowerupStack address uses a DNS SRV record to direct Java Edition to the assigned server port.
- Bedrock Edition: enter the address and assigned port shown by the panel in the Server Address and Port fields. Bedrock Edition does not support DNS SRV records, so it cannot discover the assigned port from the address alone. Do not leave the port set to Bedrock's default
19132.
Save the server and join it. If the free server is offline, connecting with the correct details starts it automatically. Java players use the server address, while Bedrock players must use both the address and assigned port. Wait briefly and try again while the server boots. If you want to use your own domain, see how to configure a DNS SRV record.
What to know about the free tier
Free servers stop after five minutes without players and may enter the instance queue during busy periods. Their 4 GB storage limit includes the world, plugins, mods, logs, and every other server file. If you approach the limit, free up disk space before the server becomes unable to start.
Paid servers let you set the inactive shutdown time from 1 to 120 minutes or disable automatic shutdown for 24/7 operation. They also provide larger storage limits: 50 GB on Budget, 100 GB on Standard, and 200 GB on Premium. Learn more about free-tier shutdown and paid 24/7 hosting.
Once your server is running, you can install Minecraft plugins on compatible Java server software or upload an existing Java world or Bedrock world.