 PowerupStack
Restrict scheduling to this region is enabled by default. While it is enabled, the instance runs only in the region you selected. If that region has insufficient capacity, the instance waits rather than starting elsewhere.
You can disable restricted scheduling to give the platform more capacity options. When it is disabled, an instance may run in a different region if the selected region has insufficient capacity. This can reduce queue times, but a more distant location may increase latency for players.
Step-by-step guide
1. Open region settings in the instance dashboard
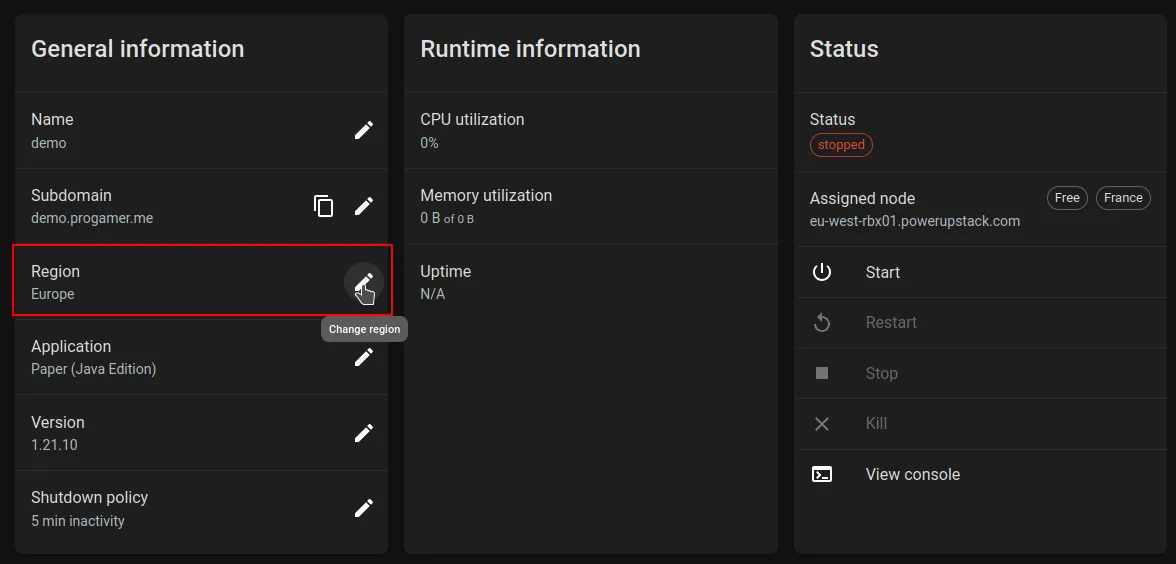
- Go to your instance's dashboard.
- Under General information, locate the Region field.
- Click the Edit button to open the region settings dialog.
2. Check restricted scheduling
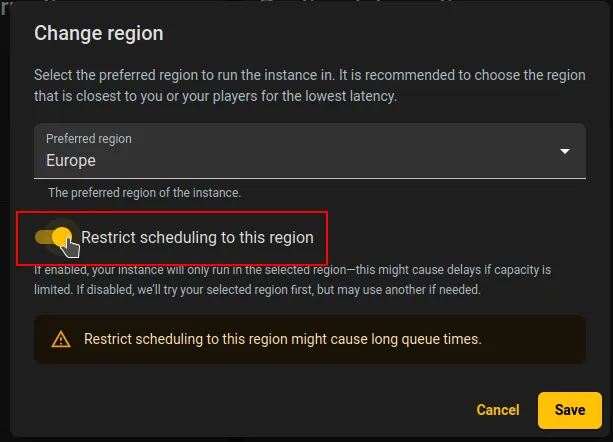
- In the dialog, select your preferred region.
- Leave Restrict scheduling to this region enabled to keep the instance in that region. This is the default.
- Disable it only if you want the scheduler to use another region when the selected region has insufficient capacity.
- Click Save
Your instance will now be pinned to this region the next time it starts.
Tips & considerations
Expect longer queue times
Restricted scheduling reduces the number of eligible nodes, which may increase queue times when the selected region has insufficient capacity.
Want faster access?
- Upgrade to a paid plan to get priority access and skip the queue.
- Or, disable the region restriction to allow flexible scheduling and shorter wait times.
You can also change the selected region or troubleshoot high ping.