How to add a resource pack to your Minecraft server
Customize your Minecraft server with resource packs that change textures, models, sounds, and more. PowerupStack makes it easy by hosting the pack and handling the configuration for you.
What are resource packs?
Resource packs allow you to personalize Minecraft by modifying:
- Textures and models
- Music and sound effects
- Languages and fonts
- Splashes, credits, and more
While adding them to your local client is simple, configuring them on a server requires a few extra steps—unless you're using PowerupStack.
Uploading a resource pack to PowerupStack
PowerupStack simplifies the process by hosting the resource pack and auto-filling the required configuration. Here's how to do it:
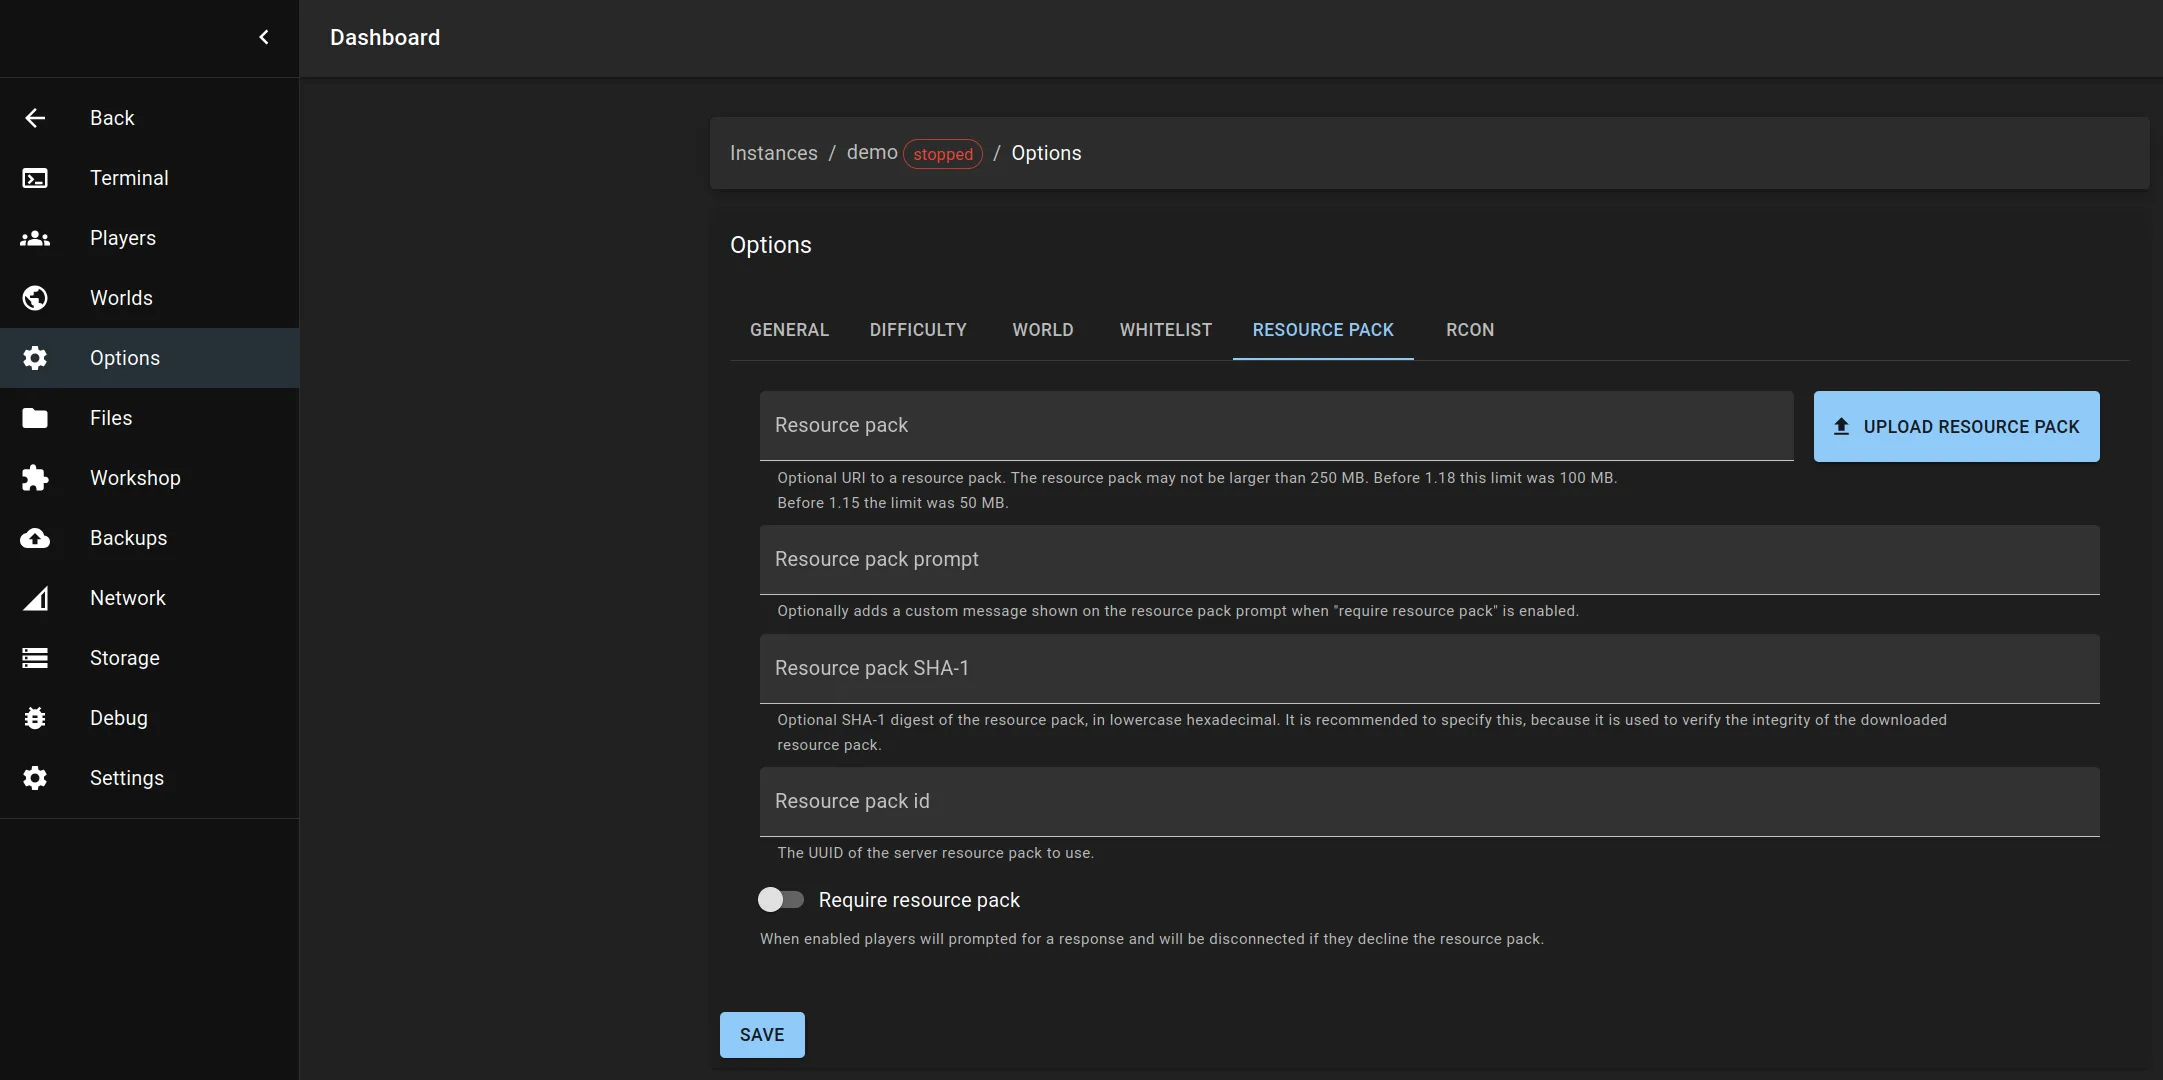
1. Open the resource pack settings
Go to the options page of your PowerupStack instance and click the resource pack tab.
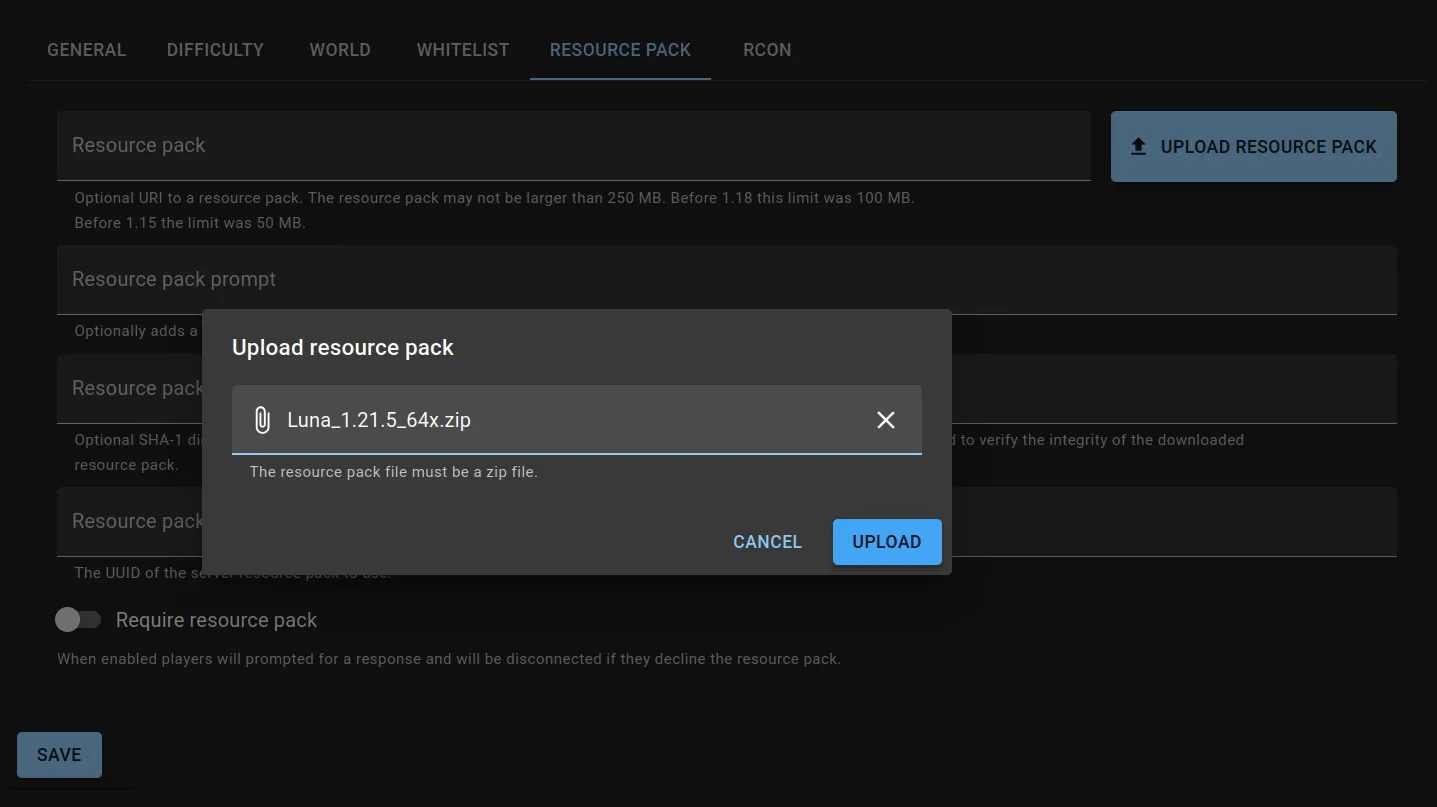
2. Upload your resource pack
Click upload resource pack to open an upload file dialog.
Select your .zip resource pack file and click upload.
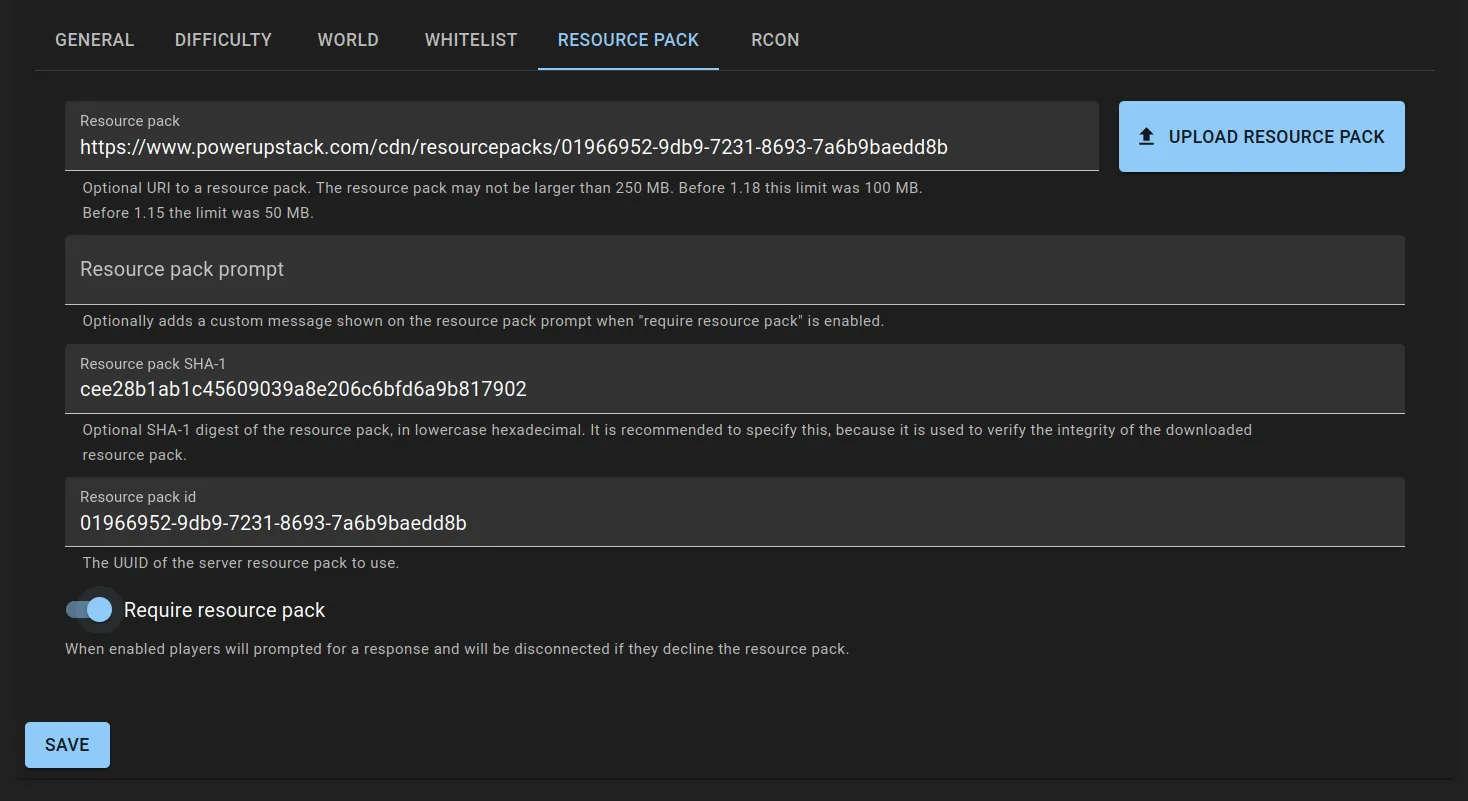
3. Review the configuration
Once uploaded, PowerupStack automatically fills in:
- Resource pack URL
- SHA-1 checksum
- Resource pack ID
You can also:
- Toggle require resource pack (forces clients to accept it)
- Add a custom resource pack prompt
4. Save and restart
Click save to apply the settings. Restart your Minecraft server to activate the resource pack.
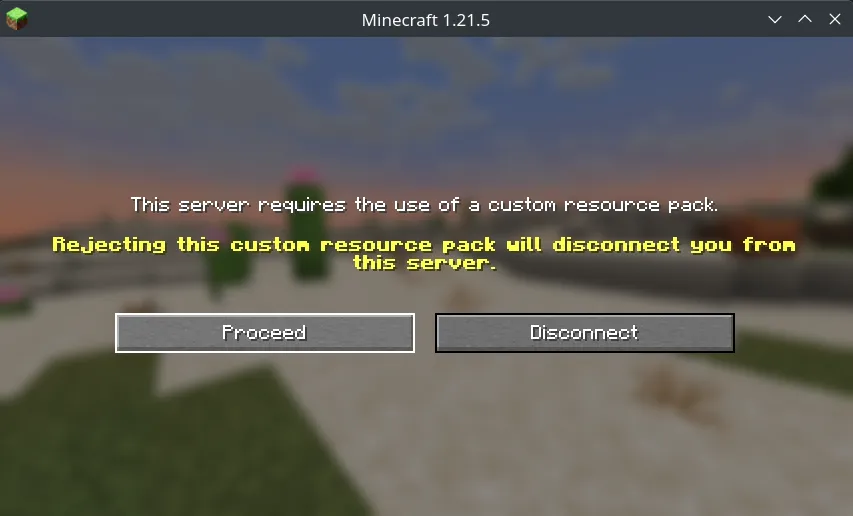
Join with the resource pack
Players joining your server will be prompted to download the resource pack. If require resource pack is enabled, players who decline will be disconnected.
FAQ
What is the SHA-1 checksum for?
The SHA-1 checksum ensures the integrity of the resource pack. If the checksum differs from a previously cached version, the client will re-download the updated pack.